| About Me |
| Publications |
| Projects |
| Contact Me |
The goal of this project was to explore procedural texturing and UV mapping in Maya using a fruit bowl model. The fruit bowl model was taken from challenge number 1 on 3drender.com. I used more of procedural texturing than UV mapping due to the number of NURBS objects in the scene.
I started by exploring the type of objects in the scene and what all needed changes. The scene contained meshes, polygons and NURBS, hence was very hard to decide on one single way to shade all the fruits.
The fruits that could be textured using procedural texturing and graph networks in Maya were shaded first. Example: Plums, Orange, Cherry and Pear. I used the plum texture tutorial for the plums and the pear.
Next, I used mental ray’s msss_fast_simple shader to texture the grapes. It took me a while to get the right radius for setting up scattering. I tried a lot of different positions for the key light to get just the right color. Also, the key light color shade is a little blue, this prevents the scene from looking hyperreal.
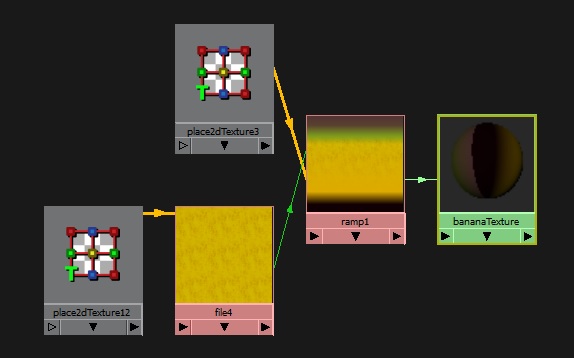
Lastly, I started converting NURBS to polygons for UV mapping. The first object I converted was the apple leaf. As it turns out the conversion created way too many quads and made it a whole lot difficult to create UV maps, but I somehow got it to work. Moving on to converting and UV mapping the apple and the banana, the process became way too tedious and the conversion created way too many quad faces to deal with. Hence, I decided to take advantage of the NURBS and used square texture images from the web to lay on the objects. For example, the banana is actually textured using a ramp shader but the middle shade is a textured image. A screenshot of the graph network for the banana shader is given below. I use the same technique for the apple. The only other thing I created UV maps for was the table cloth.


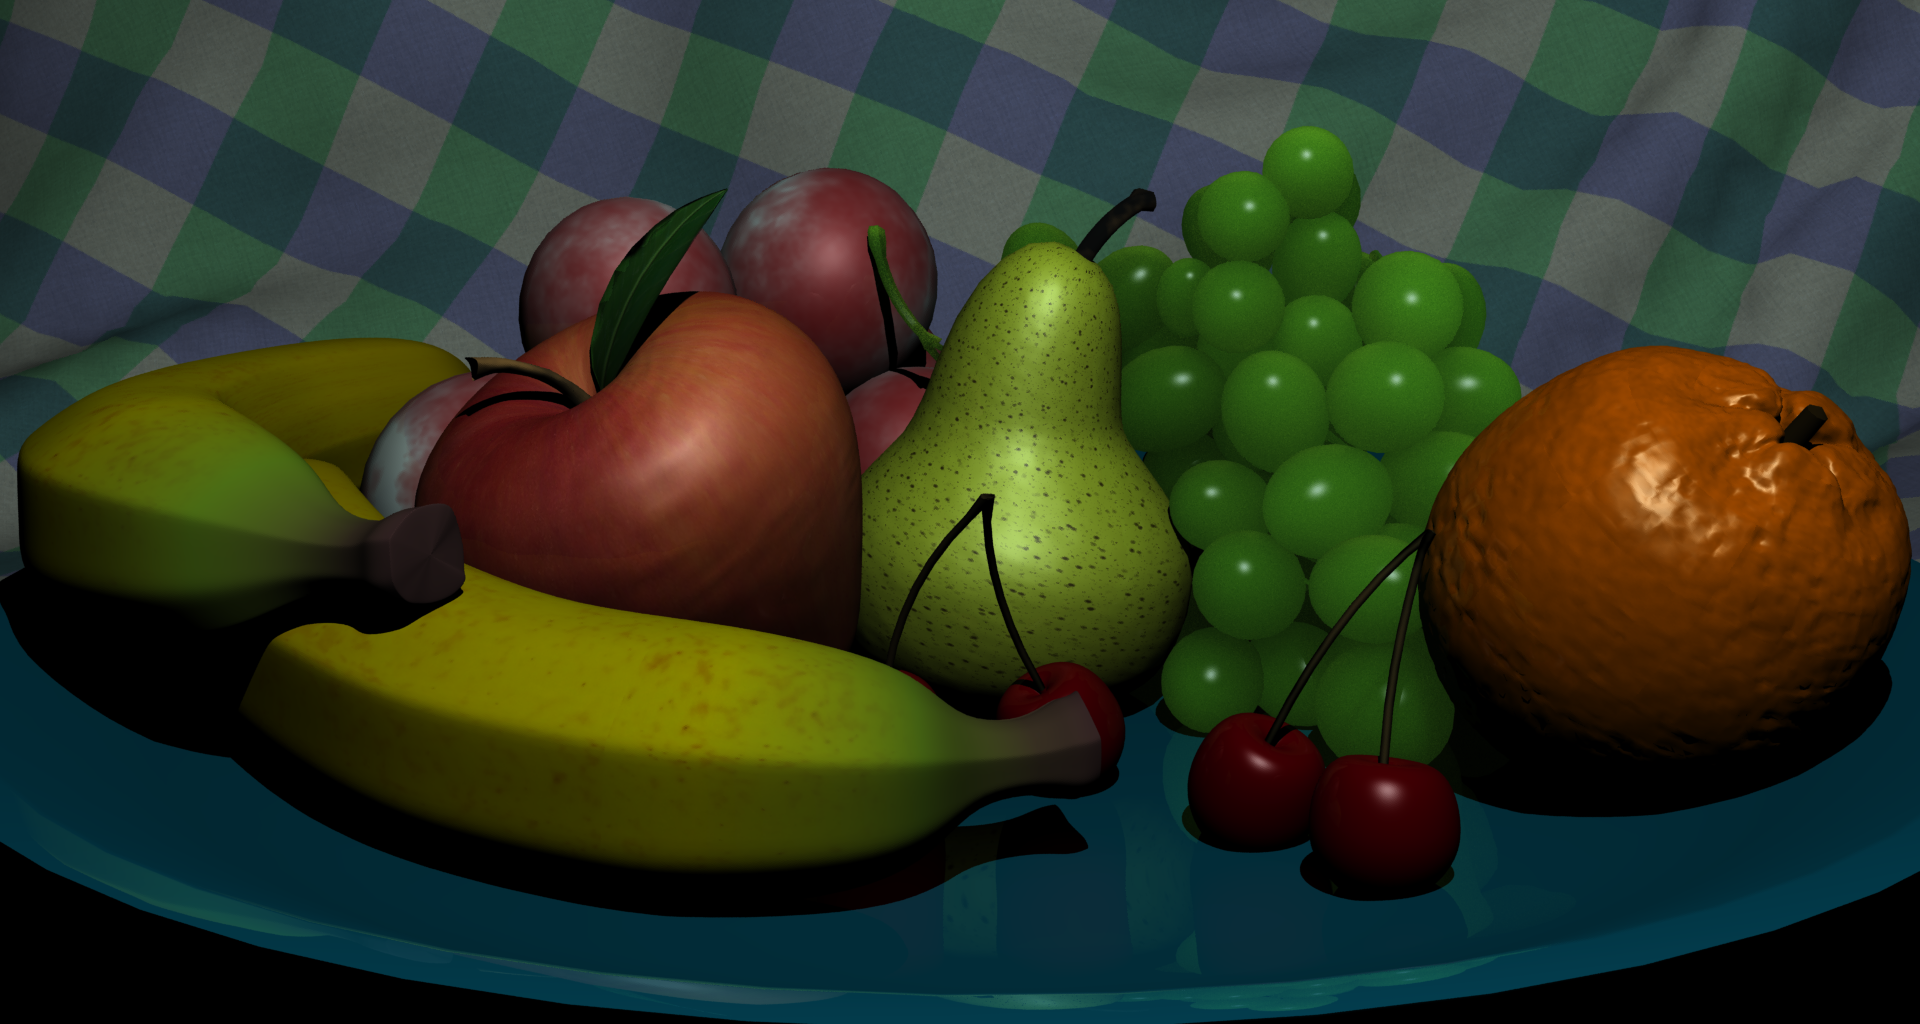 First Render
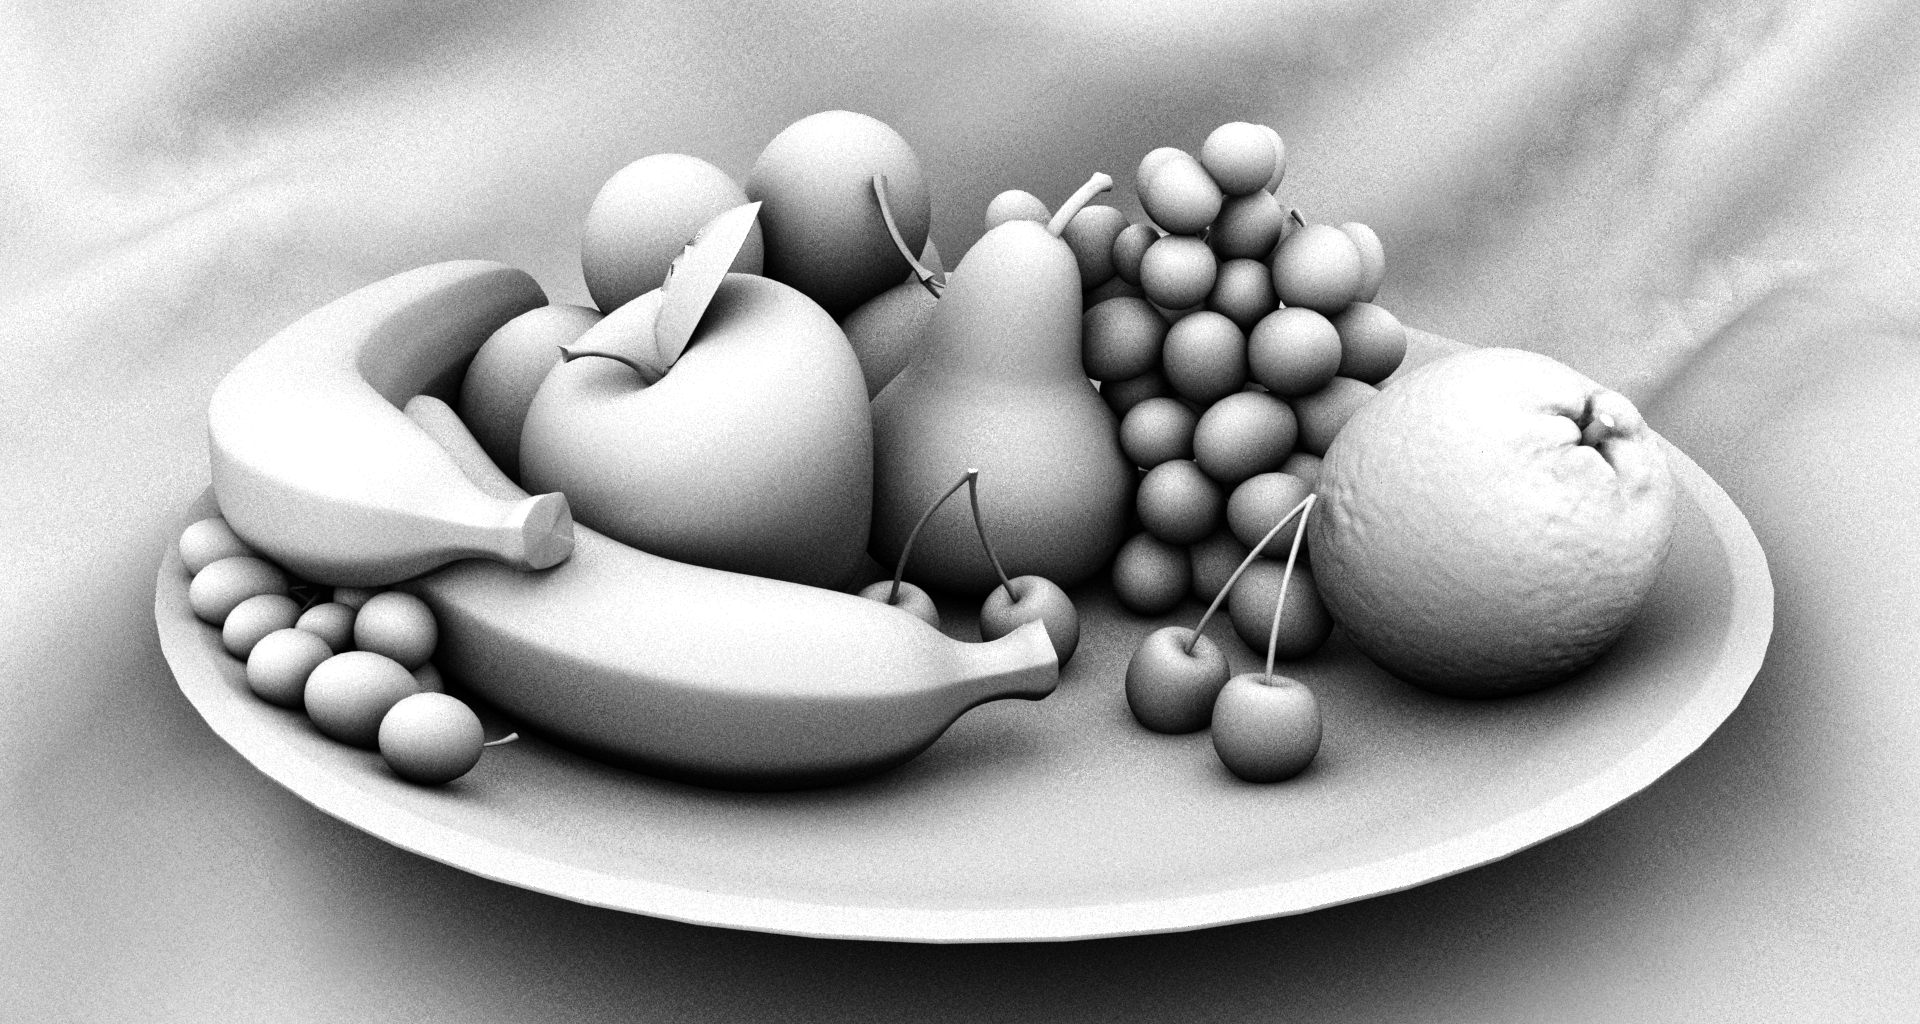
Ambient Occlusion Pass

Final Render

